Authentic Flan Recipe: Easy 5-Ingredient Secret to Silky Sweetness
There are few desserts as universally beloved and undeniably elegant as a perfectly crafted flan. This classic baked custard, adorned with a glistening, rich caramel sauce, has captivated palates across Latin America and Spain for generations. Often considered a luxurious treat reserved for special occasions or restaurant menus, the truth is that making an authentic, silky-smooth flan at home is far simpler than you might imagine. Forget the intimidation; with just five core ingredients and a few expert tips, you can unlock the secret to this stunning dessert and delight your family and friends. This isn't just a flan recipe; it's your invitation to become a flan pro.
Unlocking the Magic: The 5 Essential Ingredients
The beauty of an authentic flan lies in its simplicity. You don't need a pantry full of exotic items; just five humble ingredients come together to create a dessert that is far greater than the sum of its parts. Each plays a crucial role in achieving that signature creamy texture and sweet, caramelized flavor.
Here are the five pillars of your perfect flan:
1.
Granulated Sugar: This is the foundation of your iconic caramel topping. While there are variations, using plain white granulated sugar is key for achieving that clear, amber caramel. Avoid brown sugar, as its molasses content can lead to a different flavor profile and crystallization issues.
2.
Whole Eggs: Our recipe leans towards the
Mexican-style flan, which typically incorporates whole eggs. This contributes significantly to the flan's structure, richness, and overall creamy mouthfeel. While Spanish flan sometimes focuses solely on egg yolks for an even richer custard, whole eggs provide a wonderful balance and are easier to work with.
3.
Sweetened Condensed Milk: This ingredient is a game-changer. It provides the perfect level of sweetness, eliminating the need for additional sugar in the custard itself. More importantly, it contributes to the flan's luxurious density and incredible creaminess, ensuring every bite is a decadent experience.
4.
Evaporated Milk: Do not underestimate the power of evaporated milk! This often-overlooked dairy product is absolutely essential for achieving the flan's characteristic silky-smooth texture. Its concentrated nature, without the added sugar of condensed milk, balances the sweetness and provides a depth of creaminess that cannot be replicated with regular milk or even half-and-half. Swapping it out will fundamentally alter the texture you're aiming for, so stick with it!
5.
Vanilla Extract: While some traditional Spanish flans might omit it, a touch of pure vanilla extract elevates the flavor profile of the custard beautifully. It adds a warm, aromatic note that complements the caramel and dairy, creating a more complex and inviting taste.
With these five ingredients, you're not just making a dessert; you're crafting an experience.
The Art of Caramel: Easy Steps to a Glistening Topping
For many, the caramel is the most intimidating part of making flan. Visions of burnt sugar, sticky messes, or crystallizing lumps often deter aspiring home bakers. But fear not! Our "wet caramel" method simplifies the process, making it accessible even for first-timers. With a little care and attention, you'll create a perfectly smooth, shimmering golden caramel every time.
Safety First: Caramel gets extremely hot, reaching temperatures that can cause severe burns. Work carefully, keep children and pets away from the stovetop, and avoid touching the caramel directly.
Here’s how to master it:
1.
Combine Sugar and Water: In a heavy-bottomed saucepan, combine your granulated sugar with a small amount of water (enough to moisten the sugar). This "wet" method helps the sugar dissolve evenly and prevents premature crystallization, making the process much more forgiving than a dry caramel.
2.
Heat Gently: Place the saucepan over medium-low heat. The goal is to melt the sugar slowly. Resist the urge to stir! Stirring can introduce air, which encourages crystallization, resulting in a gritty caramel.
3.
Swirl, Don't Stir: As the sugar melts and begins to bubble, gently swirl the pan occasionally to ensure even cooking. Watch closely as the mixture transforms from clear syrup to a pale gold, then deepen to a rich, amber hue. This color indicates a perfect balance of sweetness and a hint of bitterness, which is crucial for a well-rounded flan.
4.
Act Quickly: Once your caramel reaches that beautiful amber color – usually within 5-10 minutes – immediately remove it from the heat. Caramel continues to cook from residual heat, so acting fast is key to preventing it from burning.
5.
Coat the Pan: Carefully pour the hot caramel into your flan mold (a flanera, round cake pan, or individual ramekins). Using oven mitts, swirl the pan immediately to evenly coat the bottom and slightly up the sides. The caramel will set quickly as it cools, forming a hard, glassy layer.
You’ve conquered the caramel! Now you're ready for the silky custard.
Assembling and Baking Your Silky Custard to Perfection
With your gleaming caramel foundation in place, it's time to prepare the star of the show: the ultra-creamy custard. This stage is remarkably straightforward, combining your remaining four ingredients into a liquid dream that will transform into a delightful dessert.
1.
Prepare the Custard Mixture: In a large mixing bowl, combine the whole eggs, sweetened condensed milk, evaporated milk, and vanilla extract. Whisk these ingredients together until they are well combined and smooth. For an even silkier texture, you can use a blender to mix the ingredients for about 30 seconds to a minute; this helps incorporate everything thoroughly and can reduce air bubbles.
2.
Strain for Smoothness (Optional but Recommended): For an extra-velvety flan, consider straining your custard mixture through a fine-mesh sieve. This step removes any tiny bits of cooked egg white (chalazae) or unmixed ingredients, ensuring a flawlessly smooth custard.
3.
Pour into the Pan: Carefully pour the custard mixture over the set caramel in your prepared flan mold.
4.
The Water Bath (Bain-Marie) is Key: This is a non-negotiable step for achieving that signature silky flan texture. Place your flan mold into a larger roasting pan. Then, carefully pour hot water into the larger pan, reaching about halfway up the sides of your flan mold. The water bath ensures that the flan cooks gently and evenly, preventing the custard from curdling or developing a rubbery texture. It also creates a moist environment in the oven, preventing cracks and promoting a smooth top.
5.
Bake Until Set: Transfer the roasting pan with the flan and water bath to a preheated oven (usually around 350°F / 175°C). Baking time can vary, but generally, it takes about 50-70 minutes for a large flan, or less for individual ramekins. The flan is ready when the edges are set, but the center still has a slight jiggle. A knife inserted near the center should come out clean.
6.
Cool and Chill: Once baked, carefully remove the flan mold from the water bath and let it cool completely on a wire rack at room temperature. This gradual cooling is important for the flan's final texture. After it has cooled, cover it with plastic wrap and refrigerate for at least 4 hours, or ideally, overnight. Chilling is crucial; it allows the flan to firm up properly and the flavors to meld beautifully. In fact, flan is one of those fantastic desserts that are best made a day or two in advance, making it perfect for gatherings and parties. For more detailed tips on perfecting your flan, check out our guide on
Mastering Homemade Flan: Silky Custard & Perfect Caramel Tips.
The Grand Reveal: Unmolding and Serving Your Masterpiece
The moment of truth! Unmolding your flan is perhaps the most exciting part of the entire process. With a little confidence, you'll reveal a glistening, caramel-drenched masterpiece that will impress everyone.
1.
Loosen the Edges: If you've refrigerated your flan, let it sit at room temperature for about 10-15 minutes before unmolding. This helps the caramel soften slightly. Run a small, thin knife or an offset spatula carefully around the inner edges of the flan mold. Be gentle to avoid damaging the flan.
2.
Prepare for the Flip: Select a serving plate that is larger than your flan mold and has a slight rim to catch the delicious caramel sauce. Place the serving plate directly on top of the flan mold.
3.
The Confident Invert: In one swift, confident motion, holding both the pan and the plate firmly, flip the flan over onto the serving plate. You might hear a satisfying "thwock" or a slight suction release.
4.
Lift and Behold: Gently lift the flan mold. If all has gone according to plan, your flan will pop out perfectly intact, shimmering with a smooth, even layer of golden caramel sauce that cascades down its sides.
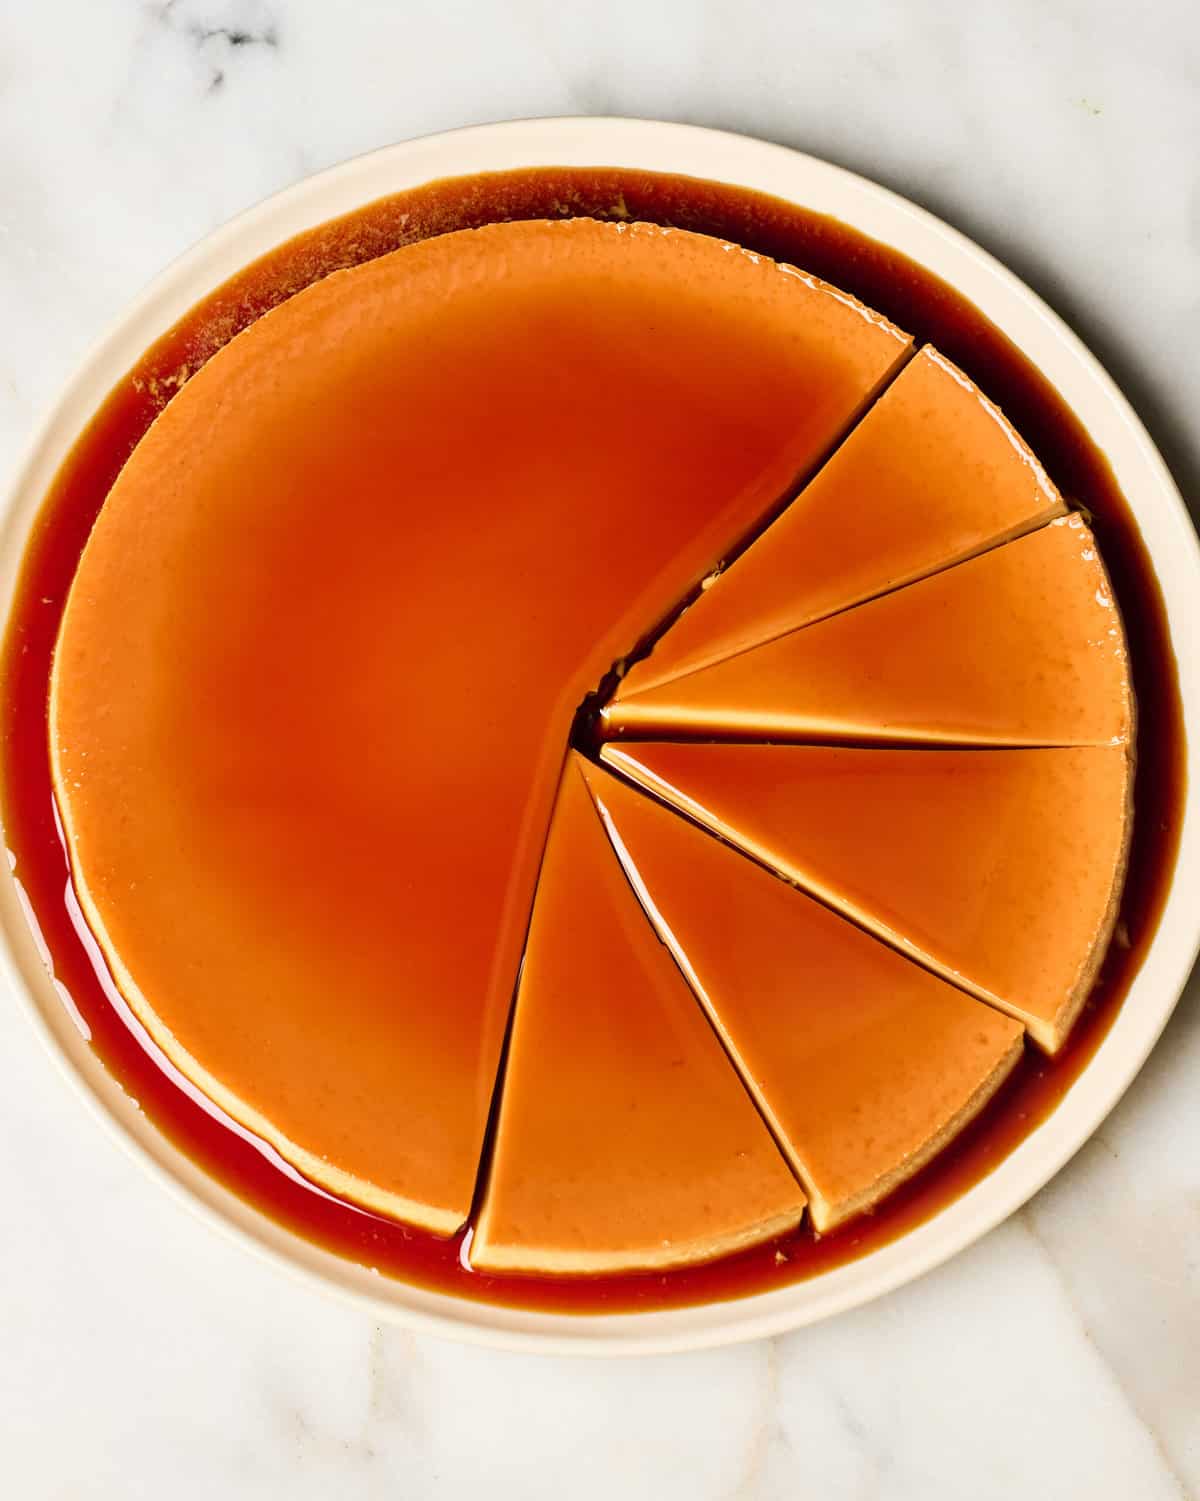
Serve your authentic flan chilled or at room temperature. It's exquisite on its own, but you can also dress it up with a sprinkle of fresh berries, a dollop of whipped cream, or a side of strong coffee – a classic pairing. This sweet, creamy Spanish custard, cooked until golden and packed with rich dairy, is always a crowd favorite.
Conclusion
From its simple ingredients to its elegant presentation, flan is a dessert that truly delivers on taste and visual appeal. By following this easy 5-ingredient recipe and embracing the few crucial techniques, especially for the caramel and water bath, you can effortlessly create an authentic, silky-sweet flan right in your own kitchen. Whether you’re looking to wow guests at a dinner party or simply treat yourself to a luxurious dessert, this flan recipe is your secret weapon. So, gather your ingredients, set aside a little time, and prepare to indulge in one of the most satisfying and delicious custards you'll ever make. Enjoy the journey to becoming a flan artisan!